Monday 28 October 2013

French Toast Cupcakes

Today I made French Toast Cupcakes

Anybody that knows me will know two of my great loves are French Toast and turning things that aren't normally cupcakes into cupcakes. I love the idea of taking such basic ingredients of bread and eggs and turning them into something magical. I stumbled upon this idea online before and have had such a desire to make them ever since. These little guys play a trick on your taste buds as they look like a normal cupcake but then they taste like French Toast it normally takes people a second for the penny to drop. They are like little bread and butter puddings too. I add a slight crumb to the tops of these cupcakes for a crunchy contrast to the super soft texture of the cupcake. 


These cupcakes are so versatile you can eat them at any part of the day. They are a pretty quirky take on a fairly traditional breakfast. I normally serve these for breakfast still warm drizzled with Maple Syrup with a cup of tea. Although in my house we've been known to have one for dessert with ice-cream or as a late night snack. The mixture is so easy to throw together and can stay in the fridge for a day or two. In fact, they turn out better when you let the bread rest in the mixture for a number of hours or even over night. The bread cubes get to soak up all the eggy goodness. I use a typical Italian style loaf for this recipe, I normally buy the bread a day or two before I need it as the whole process is easier if the bread is a couple of days old and not too soft. 


Ingredients: 
( Makes 12 )
For the Cupcakes:

  • 1 Large Italian or French Loaf.
  • 120mls Milk
  • 7 Large Eggs
  • 1 Teaspoon Vanilla Extract
  • 2 Tablespoons Granulated Sugar
  • 2 Tablespoons Golden Sugar
  • 1/4 Teaspoon Nutmeg
  • Maple Syrup - to serve

For the Topping:

  • 40g Plain Flour
  • 20g Butter
  • 2 Tablespoons Granulated Sugar
  • 2 Tablespoons Golden Sugar

Instructions: 

1. Preheat the oven to 180C. Using a sharp knife trim off all the crust from the loaf of bread and cut into 3/4 inch cubes. Place all cubes into a large bowl. (I normally make breadcrumbs from the crusts I cut off, these can be frozen up to three months)


2. In another bowl whisk the Eggs, Milk, Nutmeg and Sugars until fully combined and light in colour. 

3. Pour the mixture over the bread cubes and mix around carefully with a spoon until all cubes are coated. Chill in the fridge for at least half an hour or a couple of hours. You can leave the mixture in the fridge over night (So you can prepare for breakfast the night before)


4. To make the crumb topping place the Butter, Flour and Sugars in a small bowl and mix until resembles breadcrumbs. Set aside.


5. Oil your cupcake tin. Fill each space right up to the top. Sprinkle a generous amount of the crumb on top of each. 


6. Bake for 20-24 minutes. Mine normally take 22 minutes. You will know when the top of the crumble is nice a golden brown. Leave to cool for 6-8 minutes in the tin then turn them out on to a wire wrack. Drizzle with copious amount of Maple Syrup and Enjoy. 


"I'd rather have too much of a good thing than not have the good thing at all"

Sunday 27 October 2013

M&M Cookies

Today I made M&M Cookies

Want something yummy but don't fancy just any cookie. This recipe is super easy and perfect to help you use up the extra candy that might be hanging around after Halloween. I don't know what it is but I always seem to have an abundance of M&M's after Halloween even if I didn't buy any they just appear in my house. My Nieces and Nephews always love these Cookies. They're very colourful and really soft and chewy and that contrasted with the crunch of the shell of the candy. If you eat them warm the Chocolate inside the shell is still melted so it's like little pockets of chocolate sauce within the cookie. These cookies act as perfect wafer for ice-cream also. A scoop of Vanilla ice-cream in between two Cookies makes a perfect dessert.

I like to use the regular M&M's in this recipe but I have used the Peanut M&M's in the past and I plan on using the Crispy ones in the future. I always pick M&M's over smarties for recipes like this. I feel the Chocolate melts better and the colours don't seem to run as much during baking. These Cookies use my basic Soft and Chewy Cookie Recipe. I use more Golden Sugar than White Sugar in this recipe. Golden Sugar gives the cookie a much softer, chewier and moist consistency while the White Sugar induces spreadying so the Cookie will end up both soft and thick as well as being big in size. It's important to use both Sugars in today's recipe. I plan on using White Chocolate Chips the next time I make these. 


Ingredients:
(Makes 12 Large) 

  • 170g Unsalted Butter
  • 150g Golden Sugar
  • 50g Granulated Sugar
  • 1 Large Egg - At room temperature
  • 2 Teaspoons Vanilla Essence 
  • 250g All purpose Flour
  • 2 Teaspoons Cornstarch
  • 1 Teaspoon Baking Soda
  • 200g M&M's 

Instructions:

1. Preheat oven to 160°C. Line two baking trays with baking parchment or silicone baking 
mats.

2. In a large bowl cream the butter and Golden and Granulated Sugar together, you can do this by hand with a spatula or whisk or with a hand held mixer until light and fluffy. Mix in the egg and vanilla and mix again until fully incorporated.


3. Scrape down the sides of the bowl when needed. When the egg and vanilla are incorporated you can start to add in the Flour, Baking Soda and Cornstarch . I like to put all the dry goods into a sieve together so everything gets incorporated evenly. 

4. Stir in the M&M's and mix through so that they are evenly dispersed throughout the Cookie Dough. 


5. Chill the dough in the fridge for at least half an hour, I normally leave it for an hour as the longer you leave the dough the better the texture of the Cookies. The dough can also be chilled for up to three days or in the freezer for three months. 

6. When the dough is chilled, take out of the fridge. Take up two Tablespoons of the mixture and roll into a ball in your hands. Place the balls of dough on the baking trays with a 2 inch gap in between them.

7. Bake for 8-9 minutes, until the cookies are just starting to go golden brown around the edges. I really recommend not cooking any longer than 9 minutes. The cookies may seem slightly underdone but they will continue to bake on the baking sheet for a few minutes.

8. Remove from the oven and leave to cool for 5-10 minutes, then transfer to a wire wrack.


"Chocolate is nature’s way of making up for Mondays."

Gluten Free Breakfast Cookies

Today I made Gluten Free Breakfast Cookies

Some mornings all I want for breakfast is a Cookie and cup of tea but also want to have something at least a little bit healthy. Faced with this problem I had to do some research into what I could make to satisfy both these needs. I love the idea of Granola and throwing lots of healthy ingredients together and I love cookies so I thought what If I could combine the two? These Breakfast Cookies are ridiculously easy make. All you need is one bowl and your choice of healthy ingredients and the determination not to eat all of the mix before you make them into cookies. These are not only perfect for Breakfast. The Complex carbs from the Oats fuel amazing work outs, try one before hitting the gym. 


These Cookies start with a base of Gluten Free Quick Oats. I choose to use Gluten Free Oats for an extra Health Kick. I try to go Gluten Free whenever I can get away with it with my baking and this recipe is perfect for it. You need to use Quick Oats in this recipe, The Quick Oats are more powdery than Whole Oats which will give the Cookies more structure. Another must in these cookies is the Peanut Butter, I like to use Chunky Peanut Putter to give these Cookies a nice crunchy texture. I also like to add Apple Sauce and the Cookies are sweetened with a small amount of Maple Syrup or Honey. The add-ins can include Dried Cranberries, Raisins, Pumpkin Seeds, Sesame Seeds, Honey Roasted Peanuts, Pecans, Sunflower Seeds and Chocolate Chips.


Ingredients: 
(Makes 12)

  • 180g Quick Oats
  • 80g Chunky Peanut Butter
  • 40g Maple Syrup (or honey)
  • 30g Apple Sauce
  • 40g Chocolate Chips
  • 40g Raisins
  • 0g Coconut
  • 40g Sesame Seeds 
Instructions:

1. Preheat oven to 180°C. Line a large Cookie sheet with parchment paper or a silicone baking mat. Set aside.

2. Combine all the ingredients in a large bowl using a wooden spoon. Mix until all the ingredients are combined. The dough should look quite stiff.


3. Take a large Tablespoon of the mixture and roll around between the palm of your hands and form into a ball. Place onto prepared cookie sheets. Slightly flatten the tops of the cookie dough, the cookies will not spread in the oven so press into the shape you wish them to have. 


4. Bake for 14-16 minutes or until the edges are slightly browned. Allow to cool fully on the cookie sheets before transferring to a wire rack. 

5. Cookies will stay fresh in an air tight container at room temperature for one week. You can also freeze these cookies for up to 3 months. 


"Got Milk?"

Sunday 20 October 2013

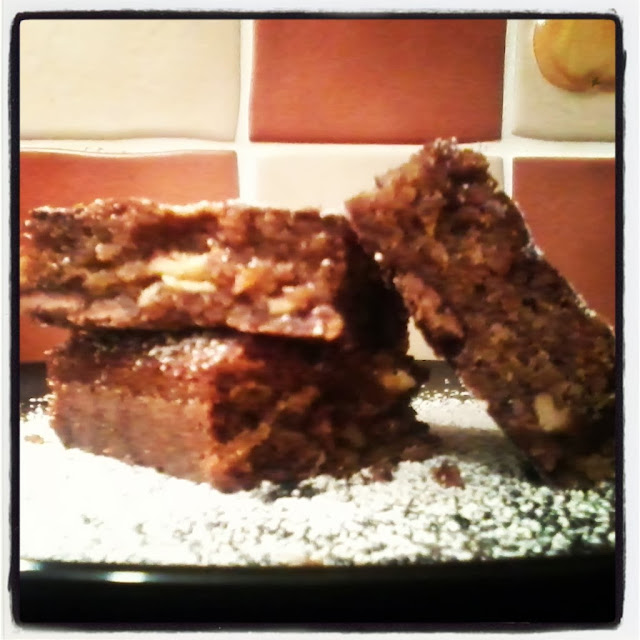
Walnut and Chocolate Chunk Brownies

Today I made Walnut and Milk Chocolate Chunk Brownies

This is one of my newer Brownie recipes and is quickly growing to be one of my favourites. These Brownies are packed full with Walnuts and large Chocolate Chunks. The mixture is a basic enough brownie recipe with a tonne of add-ins. Some people seem to have problems with Brownies, getting the texture right or getting the right consistency of the mixture or using too little or too much add-ins. The Walnuts not only add a great nutty flavour but also a fantastic texture. The slight crunch is a great contrast to the super soft and squishy texture of the brownie. These are best served warm not long out of the oven but can keep in an air tight container for 3-4 days, if they last in the house that long.


I don't use any Cocoa Powder in this recipe, all the gooey Chocolate-y goodness comes from the melted Chocolate. This keeps the recipe nice and light as there is only a small amount of flour involved. Some Brownies have a tendency to be very dense and stodgy or dry and flaky. These Brownies are rich, moist and packed full of Chocolate-y and nutty flavour. Melting the Butter and Chocolate together and beating the Eggs and Sugar together means there's more Liquid ingredients than Dry Ingredients, this allows the Brownies to stay super moist and just melt in your mouth. You can use any type of nut in this recipe: Hazelnuts, Peanuts or Pecans work well in this recipe also.


Ingredients:
(Makes 12)
  • 150g Butter
  • 2 Eggs
  • 100g Plain Flour
  • 1 Teaspoon Baking Powder
  • 170g Milk Chocolate
  • 150g Golden Sugar
  • 55g Walnuts
Instructions:

1. Preheat the oven 160°C. Lightly Oil a 20" square baking tray.  

2. In a large bowl whisk together the Eggs and the Golden Sugar until light and fluffy. It will start to look airy and will lighten in colour.


3. In another bowl melt the butter and 3/4 of the Chocolate in the microwave. I always use the microwave to melt Chocolate as if you do it on the oven you have to do it oven a pan of boiling water which gives off a lot of steam and during the melting process if any moisture gets into the Chocolate it could ruin the whole batch. 


4. Add the melted Butter and Chocolate into the Eggs and Sugar and mix fully. Then sift the Flour and Baking Powder into the Liquid Ingredients and mix till fully combined. 


5. Chop up the Walnuts and remaining Chocolate and add into the mixture. Stir the add-ins carefully. I normally hold back a small handful of the Walnuts for the top of the mixture.


6. Pour the mixture into your Oiled baking tray and smooth out the top to make sure it's even.  Sprinkle the remaining Walnuts on top of the mixture.


7. Place in the oven and bake for 20-25 minutes. You know the Brownies are baked when the top has set and a cake tester or toothpick comes out with few crumbs on it an not liquid. Leave to cool slightly and cut into 12 even pieces. I normally sprinkle some Icing Sugar on mine to finish.


"Forget Love... I'd Rather Fall In Chocolate"

Saturday 19 October 2013

Spiced Pumpkin Cupcakes with Milk Chocolate Frosting

Today I made Spiced Pumpkin Cupcakes with Milk Chocolate Frosting

Halloween is almost upon us and I for one am getting terribly excited. Halloween is by far one of my favourite Holidays, after Christmas of course. I love everything about the Autumn really, the turn of the colour of leaves, the chill coming into the air, the change of the fashion season and getting to wrap up in a cosy hat and scarf. I love Halloween for so many reasons, mostly because it's the one of the few times of the year you can dress up and be silly with your friends. It's such a magical time for kids getting to trick or treat, bob for apples and carve Pumpkins. I always love carving Pumpkins like many do. Ever wonder what to do with all that mush you take out from the Pumpkin? Well here's one way to use that tasty tasty mush.


I'm saving all my Pumpkin Carving Skills for nearer Halloween so I use tinned Pumpkin in this recipe. Pumpkin is actually quite low in Calories and Fat and gives cakes an amazing texture. The use of the spices with the Pumpkin really gives a Autumn-y taste. The smooth and creamy Milk Chocolate Frosting acts as a perfect complement to give a sweet spicy Pumpkin Cupcake. Meet your new Pumpkin Best Friend. Libby's tinned Pumpkin is just amazing, it's of such a good quality and is so pure and natural with no artificial taste or flavour. I add in Milk Chocolate Chips to these cupcakes for an extra little bite of sweetness but mostly because I love Chocolate Chips. Feel free to leave out the Chocolate Chips and add in Pecans, Walnuts or Pumpkin Seeds.

Ingredients:
For The Cupcakes:
  • 220g All Purpose Flour
  • 1 Teaspoon Baking Powder
  • 1 Teaspoon Baking Soda
  • 1 1/2 Teaspoon Cinnamon
  • 1/2 Teaspoon Mixed Spice
  • 100g Golden Sugar
  • 2 Large Eggs
  • 227g Pure Pumpkin
  • 120mls Vegetable Oil
  • 80mls Milk
  • 80mls Vanilla Extract
  • 90g Chocolate Chips


For the Frosting:
  • 270g Icing Sugar
  • 80g Cocoa Powder
  • 100g Unsalted Butter
  • 50mls Milk or Cream
  • 1 Teaspoon Vanilla Exract

Instructions: 

1. Preheat the oven to 180°C. Line a Cupcake tray with Cupcake cases of choice and set aside.

2. To make the Cupcakes: In a large bowl, Mix together the Flour, Baking Powder, Baking Soda, Cinnamon and Mixed Spice until combined. 

3. In another bowl, whisk the Eggs and Brown Sugar until just combined. Then add in the Milk, Oil, Pumpkin and Vanilla. Pour the wet ingredients into the dry ingredients and stir till fully combined. Then fold in the Chocolate Chips.


4. Fill up the Cupcake Tray using a Ice-Cream Scoop till each case is one third full. I normally place a small pan of water into the oven to prevent the cupcakes from rising unevenly. Bake for 15-17 minutes until a toothpick is inserted and comes out clean. Allow to cool completely before frosting. 


5. For the Frosting: Sift the Icing Sugar and Cocoa Powder to get rid of any lumps. Beat the Butter until fluffy - This normally takes me 2 minutes. Gradually add in the Icing Sugar and Cocoa Powder mix and then the milk and Vanilla. Frost the Cooled Cupcakes and Add a few extra Chocolate Chips.

"


"You'll "Fall" in love with these Cupcakes"

Friday 18 October 2013

Stuffed and Crusted Chicken Fillets, with Roast Veggies and Sweet Potato Cubes

Today I made Paleo Stuffed and Crusted Chicken with Chunky BBQ Sauce

I was recently asked by a good friend of mine to do a healthy all homemade dinner with no use of packages or jars or anything. I never like to use jars so I was thrilled to take on this challenge. I got fascinated with the ins and outs of the "Paleo Diet" recently and did a lot of research on what you are allowed and not allowed to eat. The Paleo Diet is also referred to as the "Caveman Diet" This diet is based mainly on the concept that you eat all fresh including lean cuts of Meat, Fruit, Vegetables Nuts, Pulses, Seeds and a select amount of oils with an emphasis on Nut Oils and Coconut Oils. This dish consists purely of lean Meats, tonnes of Veggies, Sweet Potatoes and a yummy homemade BBQ Sauce. 


Chicken is one of the leanest meats you can choose while still being super tasty and really moist. All around a perfect meat in my eyes. This chicken is stuffed with a mixture I made for stuffing chicken or using as a sausage substitute. It's made from very lean Pork mince, Wild Mushrooms and Herbs all blitzed together - a great way to up the protein levels of the dish. The crust is made from breadcrumbs - I make a Paleo Friendly bread using Almond Flour and Coconut oil but you can use Gluten Free Bread to make your breadcrumbs. I mix the Breadcrumbs with Cracked Black Pepper, Paprika, Basil, Sesame Seeds and Shredded Coconut. 
This dish is served with yummy Roast Vegetables, Sweet Potato Cubes and the best BBQ Sauce ever. The fact it's Paleo and super healthy is just a brilliant bonus. There is very little fat in this dish as there is only a tiny amount of Walnut oil used. The sauce came about by accident one day. I was just making a normal tomato sauce and then I realised I had the ingredients to make a BBQ Sauce so I thought I'd give it a go. Then when I had it made, along with tasting amazing and undoubtedly BBQ-y I realised it just happened to be Paleo. I leave this sauce a little chunky so it adds a great texture to the dish. The Sauce has a great sheen to it and a tangy, sweet and zingy flavour.

Ingredients:
For the Crusted Chicken:
  • 3 Chicken Fillets
  • 60g Sausage Meat - Homemade
  • 1 Large Egg
  • 2 Teaspoons Paprika
  • 1 Slice of Gluten Free bread, breadcrumb-ed - Homemade Paleo Bread
  • Cracked Black Pepper
  • 2 Tablespoons Chopped Nuts
  • 2 Tablespoons Sesame Seeds
  • 2 Tablespoons Shredded Coconut
For the Roast Vegetables:
  • 4 Large Carrots
  • 1 Red Pepper
  • 1 Yellow Pepper
  • Large Handful of Mange Tout
  • Large Handful of Baby Sweetcorn
  • Half a lemon
For the Sweet Potato Cubes:
  • 3 Large Sweet Potatoes
  • Tablespoon of Walnut Oil
  • 2 Teaspoons Paprika
For the BBQ Sauce:
  • 1 Large Onion
  • 2 Cloves of Garlic
  • 300g Cooked and Crushed Tomatoes 
  • 2 Teaspoons Paprika 
  • Juice of Half a Lemon
  • 1 Tablespoon Molasses 
  • 1 Tablespoon Raw Honey
  • 2 Teaspoon Cider Vinegar 
Instructions: 

1. Butterfly the three chicken fillets. Place the homemade Sausage Meat into the pocket in the Chicken Fillet and close over the side again and press secure. 


2. In a bowl mix together the Breadcrumbs, Paprika, Sesame Seeds, Chopped Mixed Nuts, Shredded Coconut and Cracked Black Pepper. In another bowl whisk the egg. Dip each Chicken Fillet first in the egg and then into your crust mix. Make sure you cover the chicken fillets fully with crust and then place on a baking tray.


3. For the Roast Vegetables: Dice your carrots on the diagonal - to make them look pretty, try keep them all roughly the same size and place them in a baking tray. Dice up the Red and Yellow Pepper and add to the carrots, finally add in the Mange Tout and Baby Sweetcorn. Squeeze over the juice of half a lemon and season.


4. For the Sweet Potatoes Cubes: Cut up the Sweet Potatoes into cubes and place in a baking tray - I like to leave the skins on for the extra fiber (nothing to do with the fact I'm lazy). Drizzle with a small amount of Walnut Oil and then sprinkle with the Paprika. 

5. Place the Chicken fillets, Vegetables and Sweet Potatoes into the oven at 200°C for 20-25 minutes. While they are in the oven you can make the sauce.

6. Fry the finely diced Onion and crushed Garlic in a frying pan until soft - you don't need any colour on them. Add in the Cooked and Crushed Tomatoes and simmer for 2-3 minutes. Add in the Paprika, Lemon Juice, Molasses, Honey and Cider Vinegar and simmer for a further 8-10 minutes. The sauce will start to thicken as it starts to reduce leaving a thick, glossy, tangy and sweet healthy BBQ sauce. 


7. When the Chicken Fillets are golden brown and the Vegetables and Sweet Potatoes have softened slightly you can take up your yummy healthy meal and slather with your yummy BBQ Sauce.


"Following the Paleo Diet has become much easier with the news the earliest known Winery was in a Cave "