Showing posts with label Ardkeen Quality Food Store. Show all posts

Monday, 9 September 2013

Chewy Cranberry and White Chocolate Cookies


Today I made Cranberry and White Chocolate Cookies

These cookies like my "Chocolate Chip Cookies" are melt in the mouth. Having problems making your cookies super soft, thick and chewy is a thing of the past. The addition of Cornstarch to your cookies dough is the answer to all your Cookie Woes. Think about it, Cornstarch is often used to thicken sauces and soups, it only makes sense it would do the same to Cookies. The lack of high levels of Gluten will mean the texture of your cookies and cakes are much lighter. The most important thing about these cookies is the Baking Time. Take the cookies out of the oven after 8/9 minutes, I normally don't leave the kitchen while they are baking as one or two minutes over and the cookies will lose the texture you're looking for. The cookies will appear soft and underdone when you take them out but they will continue to cook for 3-4 minutes on the baking sheets. I normally leave them rest of the baking sheets for 8 minutes so they can firm up slightly and start to cool down before moving them to a wire wrack.


There are certain food combinations that are just meant to be and White Chocolate and Cranberries are definitely one of them. Those tangy little berries are truly the soul mates of sweet, creamy White Chocolate. It's a spin off of the typical Sweet'n'Sour combination that we are so familiar with. Each bite hits you with a zingy burst as you bite down on a Cranberry then you are soothed by the sweetness of the White Chocolate. White Chocolate is my favourite add-in to nearly all of my baked goods but especially in cookie Recipes. Cranberries not only add a great texture and flavour but also a burst of colour. I always think of Cranberries as the pretty sister in the dried fruit family. Ardkeen Quality Food Store have an impressive Dried fruit and Nuts section including dried Cranberries, Raisins, Sultanas, Crystalised Ginger and a wide variety of different nuts which feature a lot in my baking.


Ingredients:
(Makes 24) 
  • 170g Unsalted Butter
  • 150g Light Brown Sugar
  • 50g Granulated Sugar
  • 1 Large Egg - At room temperature
  • 2 Teaspoons Vanilla Essence 
  • 250g All purpose Flour
  • 2 Teaspoons Cornstarch
  • 1 Teaspoon Baking Soda
  • 100g Dried Cranberries
  • 100g Callebaut White Chocolate Chips
Instructions:

1. Preheat oven to 160°C. Line two baking trays with baking parchment or silicone baking 
mats.


2. In a large bowl cream the butter and sugars together, you can do this by hand with a spatula or whisk or with a hand held mixer until light and fluffy. Mix in the egg and vanilla and mix again.


3. Scrape down the sides of the bowl when needed. When the egg and vanilla are incorporated you can start to add in the flour, Cornstarch and Baking Soda. I normally put all the dry goods into a sieve together so everything gets incorporated evenly. 

4. Stir in the white chocolate chips and Cranberries. I normally add in half of each first and work that in before adding the remainder. Try to evenly disperse the White Chocolate and Cranberries so that every cookie will get little of everything. 


5. Chill the dough in the fridge for at least half an hour, the dough can also be chilled for up to three days in case you need to make it ahead of time. 


6. When the dough is chilled, take out of the fridge. Take up about 11/2 teaspoons of the cookie dough and roll into a ball in your hands. Place the balls of dough on the baking trays with a 1 inch gap in between them. Press down slightly on each to flatten the top and bottom. 


7. Bake for 8-9 minutes, until the cookies are just starting to go golden brown around the edges. I really recommend not cooking any longer than 9 minutes. Remove from the oven and leave to cool for 5-10 minutes, then transfer to a wire wrack.


"Chocolate Doesn't ask questions. Chocolate understands."

Tuesday, 3 September 2013

Spicy Sweetcorn and Turkey Burger with Sweet Potato Wedges

Today I made Spicy Sweetcorn and Turkey Burgers with Sweet Potato Wedges


Nothing beats a good burger. Now  I'm not taking about the fast food joint burgers where the meat is wafer thin and the source is questionable. I'm talking proper homemade, meaty, sky scraper burgers the kind you struggle to get your mouth around. Once you've made your own burgers you'll never choose shop bought ever again. Not only do they taste miles better in flavour and texture but you actually know what goes in to them. You can play around with the ingredients and can make them as healthy or naughty as you like. This option uses lean Turkey mince which contains half the fat and calories of normal beef mince. Also Sweet Potato contains less Carbohydrates than regular potatoes and play a major part in the Paleo Diet.    


                                                                          Some people have the perception that Turkey meat can be quite bland and dry but these burgers are juicy and packed with flavour. I infuse the meat with a variety of different herbs and spices which really brings the flavour of the meat to a whole new level..The sweetcorn really adds little bursts of flavour and moisture to the burgers. The flour sprinkled on the surface of each patty results in the burger being crispy on the outside and soft and tender on the inside. The Chutney I use for the Burger is by "Tastefully Yours", a handmade preserves company based in Waterford and stocked in Ardkeen Quality Food Store. I honestly can't go past this Irish company for any of my preserve needs. 


The herbs and spices I use are Fresh Rosemary, Dried Basil, Paprika, OHCo Cajun Spice, Salt and Cracked Black Pepper. This mix of spices creates an almost addictive taste and really lifts the burgers. Rosemary works really well in this recipe as it gives a great taste and the bits that are on the outside get really crispy during the frying. The OHCo Cajun Spice really delivers a sweet and spicy punch. I use these same herbs and spices on the Sweet Potato Wedges along with lemon juice and crushed garlic. You can feel free to add any herbs or spices to the wedges as you like, sometimes I like to add some chili flakes for an extra kick of heat. The Wedges are a great accompaniment to the Turkey Burger along with a fresh Rocket Salad.


I chose not to use the conventional Seeded Burger Bun for this recipe. Instead I use a "Blaa" The Blaa is a soft bread roll dusted with flour, they can be soft and chewy or crispy and are exclusive to The Déise. The Blaa was introduced to Waterford by the French Hugeunots who settled in Waterford in 1693.
They brought the plain "Blanc" which was then adopted by the Waterfordians and after what only I can imagine as many poor attempts at French pronunciation we renamed this Holy Grail "The Blaa" And to this day it plays a huge part of all of our daily lives. Mostly eaten with butter or filled with bacon or ham but I decided to take this local staple one step further and discovered it really acts as a perfect burger bun.


Ingredients:
(Serves 4)

Sweet Potato Wedges
  • 4 Large Sweet Potatoes - Skins on
  • Half Lemon
  • 2 Teaspoons Chopped Rosemary
  • Olive Oil
  • Sea Salt
  • Cracked Black Pepper
  • 2 Teaspoon OHCo Cajun Spice
  • 2 Teaspoon Basil
  • 3 Crushed Garlic Cloves
Turkey Burgers

  • 500g Lean Turkey Mince 
  • 1 Egg
  • Pinch of Salt
  • Cracked Black Pepper
  • 1 Teaspoon OHCo Cajun Spice
  • 2 Teaspoons Fresh Rosemary
  • 1 Teaspoon Dried Basil
  • 1 1/2 Tablespoons Flour
  • 100g Sweetcorn
Garnish
  • 4 Teaspoon "Tastefully Yours" Chutney
  • Cheese infused with Cranberry 
  • 1 Bag Rocket Duo Salad
  • 4 Large Blaa's
  • 4 Teaspoons Mayonnaise 


Instructions:

Sweet Potato Wedges

1. Slice Sweet Potatoes length-ways into wedges, try to ensure you keep the wedges the same size so they cook at the same time. Place wedges onto a large baking tray.


2. Drizzle on the Olive Oil and sprinkle with the Sea Salt and Cracked Black Pepper. Shake the tray to coat evenly. Add in the roughly chopped  Rosemary, Cajun Spice, Basil and crushed Garlic Cloves. With your hands move around the wedges so they get coated in all the seasoning - The oil will allow the herbs and spices to stick to the wedges.

3. Cut three or four slices off the half lemon and places these onto the tray with the wedges. Squeeze half the juice out of the lemon and shake one last time. Make sure the wedges are dispersed evenly on the tray. Place in the oven and cook for 25-30 minutes at 180°C.


4. While the wedges are cooking you can make and cook the burgers. When the wedges are cooked, using a thongs to squeeze the garlic and lemon to get the last bit of flavour out of them.

5.  Finish with a squeeze of fresh lemon juice and shake the tray so the wedges are tossed in remaining infused oil.


Spicy Sweetcorn and Turkey Burgers

1. Put the Turkey Mince into a large bowl and break up with a wooden spoon. Firstly season with Salt and Pepper.

2. Roughly chop up the Fresh Rosemary and add to the mince, then add in the Cajun Spice, Basil and mix again. When all the spices are incorporated add in the Sweetcorn, it's at this point I like to switch to my hands to work in the Sweetcorn, I do this by squeezing the mixture.


3. Crack the egg into a small bowl and whisk slightly. Make a well in the center of the mixture and pour in half the egg. Work the egg into the mixture with your hands - the egg helps all the ingredients to bind together. You may or may not need the remainder of the egg.


4. Sprinkle in some of the flour as you don't want the mixture to be too wet. If you fry the burgers and they are too wet the mixture will fall apart and you will lose the all important patty shape. 

5. I like to chill the mixture in the fridge for a few minutes before I shape the burgers. Take up a quarter of the mixture into your hands and roll it around into a ball. Sprinkle a little flour on the counter and place the ball onto the floured surface. Press down slightly to flatten the top and bottom of the patty. Form the other three patties in the same way. 


6. Fry the burgers in a little Olive Oil till golden brown on either side and crispy to touch, flipping them over every few minutes. While they are frying you can get everything else ready.


7. Cut the Blaa's in half, spread a teaspoon of Mayo on the bottom of each Blaa then put a small handful of Rocket Salad on each bottom bun - The Mayo helps the Rocket from falling out of the burger when you're eating it. Make up a small salad beside the bottom bun - I like to use some of the Rocket with quartered Cherry Tomatoes and a sprinkle of sweetcorn. But you can use any kind of salad you like. Spread some of the Tastefully Yours Chutney on the top bun.

8. When the burgers are cooked take them up and place a patty on each of the bottom buns. Break up some of the Cheese with Cranberry and put on top of the burger - The heat from the burger will start to melt the cheese - I like to use cheese infused with Cranberry as everybody knows how well Turkey and Cranberry goes together. 


9.Place the top of the Blaa's on each burger. Take up the Sweet Potato Wedges and place along side the burger and then run to the dinner table...


"Do you want Sweet Potatoes Wedges with That?"

Saturday, 31 August 2013

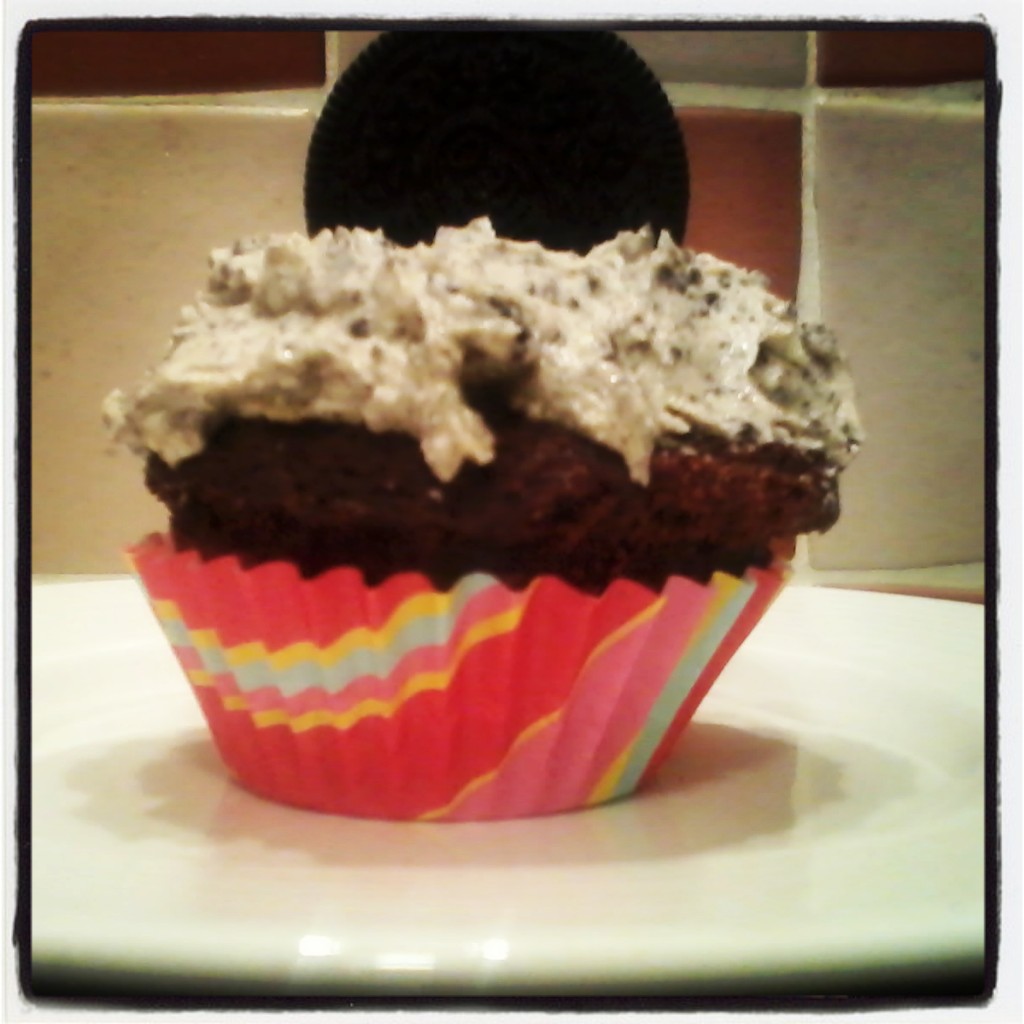
Oreo Cupcakes with Cookie Frosting


Today I made Oreo Cupcakes with Cookie Frosting


Young or Old, everybody seems to have a weak spot for the Oreo. In the Cookie World they tend to come in at a League Of Their Own. Whether you're a "Twist, Lick and Dunk" kinda person or a "Eat as many as you can before people find out you have cookies" kinda person the obsession is equally as high. When I first decided to play around with adding them to my cupcake recipe I got excited but wasn't sure how they would turn out. At first I just made a regular chocolate cupcake and used crushed up Oreo Cookies in the frosting and that was all. Since then this recipe has developed and is now even more filled with the rich Oreo goodness.


In my new and improved recipe I add an extra Oreo Cookie on the bottom of each Cupcake for a crunchy surprise as well as a great visual. And another on top, well just for good measure. When I give these Cupcakes out to people they tend to use the top Oreo as some kind of cookie spoon to eat the frosting, which I think is brilliant. The cupcake itself is quite light and fluffy and almost melts in the mouth, with a creamy vanilla frosting with speckles of Oreo dust, glistening like some kind of Cookie gold. The Chocolate I use in this recipe is Wilkies Organic Batch Chocolate, An Irish company all made by hand from Bean to Bar. Newly being stocked at Ardkeen Quality Food Store. You can really taste the difference and I'd highly recommend.


Ingredients:
(Makes 12)
For the Cupcake:
115g Unsalted Butter
45g Cocoa Powder
50g Wilkie's Chocolate -Amazonas
95g All Purpose Flour
1/2 Teaspoon Baking Soda
3/4 Teaspoon Baking Powder
1/4 Teaspoon Salt
2 Large Eggs - Room Temperature
100g Caster Sugar
50g Light Brown Sugar
1 Teaspoon Vanilla Extract
100mls Milk
24 Oreo Cookies

For the Frosting:
250g Icing Sugar
150g Unsalted Butter - Room Temperature
6 Oreo Cookies

Instructions:

1. Preheat the oven to 180°C. Line your cupcake tin with cases of your choice.

2. Melt the Butter and Chocolate together in the microwave. Heat in 30 second increments, stirring between each time. You can do this step over a bowl of boiling water on the cooker but It's easier and faster in the microwave. Stir in Vanilla Extract. 


3. In a large bowl, toss the Flour, Cocoa Powder, Baking Powder, Baking Soda and Salt until fully combined. In another bowl whisk the Eggs, Brown Sugar and Sugar until smooth. Add the cooled chocolate/butter mixture and whisk until smooth.

4. Add half the flour mixture, then half the milk. Repeat and then mix everything one last time. Don't over mix the batter as it leads to tough cupcakes. It should be quite thick at this stage so try not give in to the desire to add more milk.


5. Place an Oreo Cookie into each Cupcake case. Divide the batter between the 12 cases over the cookies. Bake for 18 minutes, or until a tooth pick or cupcake tester comes out clean. 


6. Allow to cool completely before attempting to frost.

7. For the frosting; In a bowl beat the butter for a minute or two. I normally do this by hand but feel free to use a handheld or stand mixer. Slowly add in the Icing sugar a little at a time and working through completely. 

8. Blitz the Oreo Cookies in a handheld blender until they resemble crumbs. Add the Oreo Crumbs into the Frosting and mix through. I normally chill the icing a little before frosting as it makes it easier to work with.  


9. Frost the Cupcakes using a piping bag or use a Tablespoon to place a generous amount on each then flick upwards to create a design. When frosted you can place an Oreo Cookie on top of each.
 

"People Are Like Oreos, The Good Stuff Is On The Inside"

Thursday, 22 August 2013

Black Pudding, Bacon and Asparagus Pizza


Today I made Black Pudding, Bacon and Asparagus Pizza


Pizza seems to have made it's way more and more into our staple diet over the last number of years and with it, into our hearts. With more pizza joints than pubs scattered across the country. Whether it's a Friday afternoon dinner, a mid-week snack or a late night feast, pizza is our go-to food. For every good pizzeria out there, there are an equal number of bad ones. I never really saw the point of frozen pizzas, for the same amount of time it takes to cook a frozen pizza you could have your own pizza made and it tastes a million times nicer.  Making your own pizza means you can make it as healthy or naughty as you like. Nothing beats the taste of fresh pizza dough and sauce, "just like mamma use to make".


The Pizza I made today uses a quirky combination of the freshest and finest ingredients all stocked in Ardkeen Quality Food Store. The pizza has a crispy golden brown base with an inner softness that you'd never get from a frozen pizza or boxed pizza base. The sauce tastes fresh, sweet and tangy. This fresh sauce is made using the best tomatoes I could find, Grantstown Suntini Sweet Tomatoes, which are grown a mere 4 miles from Waterford City. The secret weapon to this sauce is the OHCo Cajun Spice a fantastic Irish Organic Spice Company that Ardkeen Quality Food Store are newly stocking. The pizza toppings comprises of The Award Winning Rosscarbery Black Pudding, J. Crowe and Sons Dry Cured Streaky Bacon, Asparagus tips and Creamy Mozzarella.  


Ingredients:
(12 Inch Pizza)

For the Dough:

  • 200g DeCecco Pizza Flour - and dusting flour
  • 1 Packet Dry Yeast
  • 120mls Warm Water
  • 1 Teaspoon Honey - I like to use Déise Honey
  • 1/2 salt Teaspoon
  • 1 Teaspoon Olive Oil


For the Sauce:

  • 12-15 Grantstown Suntini Sweet Tomatoes
  • 2 cloves Garlic
  • 1/2 Red Onion
  • 1 Tablespoon Olive Oil
  • 1/2 Teaspoon Basil
  • 1/2 can Cirio Tomato Pureé
  • 1 Teaspoon OHCo Cajun Spice
  • 1/4 Teaspoon Déise Honey
  • Pinch Of Salt


For the Toppings:


  • 1/3 pack of Rosscarbery Black Pudding - Cut into cube
  • J. Crowe and Sons Dry Cured Streaky Bacon - cut up small
  • 8-10 Asparagus Tips
  • Creamy Mozzarella - amount may very on level of love of cheese

Instructions: 

Pizza Base

1. Preheat the oven to 200°C.  I normally start with the pizza dough so it can be proofing while I make the sauce and prepare the toppings. Sift the pizza flour into a large bowl - preferably glass. In a jug put the warm water, stir in the yeast till all the yeast is dissolved then add the honey, Salt and Olive Oil. Make a well in the flour and pour in half the water and yeast mixture. With a metal spoon start to incorporate the flour and water, then add in the remainder of the water and continue to mix. Normally at this point I switch to using my hands.

2. When  you have brought the dough together it will start to come away from the bowl, feel free to add a little more flour if the dough feels very sticky. When you have it together, turn the ball of dough out on to a floured surface. Begin to knead the dough by using the heels of your hands moving them in opposite directions almost trying to tear the dough then bringing it back together again. Do this for 2-3 minutes till it starts to look smooth. 
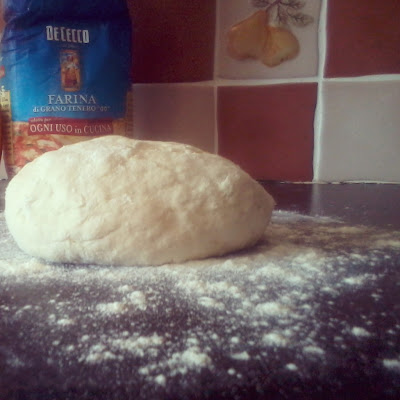


3. Put the smooth dough ball into an oiled bowl, flip the dough over once so that it is covered in the oil. Place cling film or a towel over the bowl, I normally use a damp towel to keep the dough from drying out during the proofing process. Place in a warm, dark place - Tip - I normally turn on the dryer while I'm making the pizza dough so by the time I have it ready the inside of the dryer is the perfect temperature. So you have your warm, dark place. Just make sure you don't turn the dryer on... But you can use a Hot Press or anywhere that's dark and warm. Leave the dough proof for 30 minutes. 


   Tomato Sauce


 4. While the Dough is proofing you can make the Pizza Sauce. Drizzle the Olive Oil into a frying pan. Crush or finely chop the garlic and add that in when the oil is hot. Fry for a few minutes then add in the finely chopped Red Onion. Cook these together till the onions start to soften, this normally only takes a few minutes. The onion will start to go transparent.

 5. Cut your Grantstown Suntini Sweet Tomato's in half and add them to the onion and garlic, fry these until the tomatoes start to soften, at this point I normally use a thongs to give each tomato a little squish, this helps to break the tomatoes down. These tomatoes are grown only 4 miles from Ardkeen Quality Food Store and are delivered daily so they are literally picked from the vine and then delivered to the store within hours.  It's at this point I add in my secret ingredient of 1 Teaspoon of OHCo Cajun Spice.

  6. Work in the spice, you may need to add a teaspoon of water at this point to loosen the sauce. Everything should be after cooking down and softening and start to look like a sauce - there is no need to blend this sauce, the ingredients are so fresh they cook down to . At this point add in your Cirio Tomato Pureé and honey. The honey brings out the natural sweetness of the fresh tomatoes. You can taste the sauce at this stage and see if you need to add salt or pepper. I didn't add any to my sauce as I just love the natural taste of the tomatoes. 

7. Add in the Basil now at this point. You can use fresh Basil if you wish but I normally just use Heritage Dried Basil. You still get that same Basil-y flavour and it's not wilting away in my fridge. Everybody knows tomatoes and basil are best friends and in this sauce you can taste why.


Toppings

8. Preparing the Toppings are super easy. Cut off the amount of Rosscarbery Black Pudding you wish to use, I normally use about a third, cut it in half then into little cubes, or slices if you prefer. Make sure the pieces are not too big and are all the same size as you want them all to cook well and all at the same time. 

9. Cut the J. Crowe and Sons Dry Cured Streaky Bacon into small pieces, around the same size as the black pudding cubes so that everything cooks at the same time. You can trim a little of the fat off if you wish. 

10. For the Asparagus, cut just where the tip part of the Asparagus begins and about the same amount down from that - this is the most tender part of the Asparagus. 


11. Take out the bowl containing the pizza dough from the dryer, it will have doubled in size. The next step is possibly my favourite part of making pizza. You need to knock the air out of the dough. It just so happens that the best way to do this is...... punching it repeatedly. When you have gotten the dough back to it's normal size again you and turn it out on to a floured surface.


12. The dough will be very smooth and if you press it with a finger it will spring back into place again. Make sure your surface is well floured as the dough will be slightly moist from the oil. Start to work the dough back into a ball again, sprinkling with a little flour as you need it. Begin to start pressing the air out of the dough and flattening it and getting it into the "pizza" shape aka a circle... Feel free to work it into a square or rectangle depending what shape tin you are going to cook it on. 


13. When you have it formed into the general shape you like, you can move it to your tin and work it out to the edges. I normally prick the dough with a fork a number of times before I load on the tomato sauce, I like my pizza quite saucy so I don't hold back but you can certainly add less if you wish. 


14. Now is the time to load on those toppings. I like to take my organised chaos approach to this step too. You want to make sure that you get a little bit of everything in each bite and that the toppings are not on top of each other so that It all cooks at the same time. I normally put on the Award Winning Black Pudding first then intertwine the Bacon around the Black Pudding, then the Asparagus Tips and finished with the Mozzarella, you can either slice the Mozzarella or tear it, I usually tear it as it gives a more rustic look. 


15. Bake the Pizza for 20-25 minutes at 200°C. Until the cheese is melted and starting to bubble. You can lift the base slightly with a spatula to make sure the base is nice and golden. I sprinkled this pizza with a little fine grated Mozzarella before serving. 


"Home is where the pizza is." 

Wednesday, 21 August 2013

Peanut Butter Cupcakes With Chocolate Frosting


Today I made Peanut Butter Cupcakes With Chocolate Frosting


I never really got the whole Peanut Butter Craze until I started baking with it as an ingredient in my cakes. I have friends that would literally sit down with a jar of peanut butter and a spoon and be quite content. After experimenting with using it in my cupcake recipes I finally get it. Out of all my recipes that the Peanut buttery goodness features, this is definitely the "peanutbutteriest". I slather today's cupcakes with a rich, thick chocolate frosting and top with chopped peanuts and milk chocolate chips. I've tried my hand at a number of different peanut butter recipes, I've found they can be either too dry, too dense or lacking that peanut butter flavour. Then finally one day I cracked it...


These cupcakes are incredibly moist and tender, you don't have to worry about them being too dry or falling apart, my little secret weapon in this recipe is the dark brown sugar I use to sweeten the little guys up. I love baking with dark brown sugar the most out of all the sugars. It can really deliver a moist and soft texture and I feel it was the key to cracking this recipe. The best part about these cupcakes I feel is that they actually taste like peanut butter. They aren't vanilla cupcakes with a slight taste of peanut butter they are peanut butter through and through. I maxed out this batter with 85g of chunky peanut butter for just 12 cupcakes. 


All the ingredients I used in this recipes I got in Ardkeen Quality Food Store. In this recipe I use Meridian Chunky Peanut Butter. Meridian offers an organic product made by roasting peanuts in their skins then grinding them till it forms a crunchy paste. This health food product has no added sugar or salt, it is also wheat, dairy and gluten free. I never look past Meridian for all my peanut butter needs. They also have a fab smooth version. The ingredients I used to top the frosting were Ardkeen Quality Food Store own range nuts chopped and of course my Callebaut Milk Chocolate Chips. You can also use a little melted chocolate in the frosting, 10-15g. While the cupcakes bake in the oven, you can prepare the thick and creamy milk chocolate frosting. 


Ingredients:

For the Cupcakes:
  • 150g All-Purpose Flour
  • 1 Teaspoon Baking Powder
  • 1/4 Teaspoon Salt
  • 85g Chunky Peanut Butter
  • 150g Unsalted Butter, softened 
  • 100g Dark Brown Sugar
  • 2 Large Eggs
  • 1 Teaspoon Vanilla Extract
  • 3 Tablespoons Milk


For the Milk Chocolate Frosting:
  • 250g Icing Sugar
  • 150g Cocoa Powder 
  • 180g Softened Butter - you can use half butter and half Double Cream if you wish
  • 1 Teaspoon Vanilla Extract

Instructions:

1. Preheat the oven to 180°C. Line cupcakes tin with your cases of choice. 

2. Mix together the sieved flour, salt and baking powder and set aside. Cream together the peanut butter, sugar and butter until light and fluffy- you  can do this with a handheld mixer or stand mixer but I normally just do it by hand with a whisk as I feel I lose a lot of the mixture trying to scrape it off all the different parts of the mixer.  

3. Beat in the eggs one at a time, making sure to mix thoroughly after each addition. When the eggs are fully incorporated you can add in the vanilla extract and mix. I normally beat in the eggs with a wooden spoon as I feel a whisk can agitate the eggs a little too much and may lead to heavy cupcakes

 4. Slowly Beat in the Flour mixture alternatively with the milk mixing till just combined, ensure not to over-mix as this will lead to heavy dry cupcakes. Adding a little flour then milk ensure that the mixture doesn't get too thick or thin during the mixing process. The mixture should be light in colour.


 5. Divide the mixture evenly between the 12 cases. I normally use an ice-cream scooper to divide out the mixture. That way you get the exact same amount in each case so your cupcakes will all be the same size which is handy as they will all be cooked at the same time. Consistency is important while baking, as they will look prettier if they are all the same size at the end. Bake for 23-25 minutes. Allow to cool completely before frosting.


6. For the frosting, sift together the Icing Sugar and Cocoa Powder so that it is all incorporated and there are no lumps, set aside. Beat the butter by itself for a minute until it is soft and fluffy then slowly add in the Icing Sugar and Cocoa Powder along with the Vanilla Extract. 


7. I normally chill the frosting while I'm waiting for the cupcakes to cool as it's easier to work with when it's slightly firmer. If the cupcake are any way warm the icing will melt when you put it on and it will look quite messy. It's important while making the frosting that the butter you use is softened to room temperature but in no way melted as you will not get the consistency you desire. 


8. Frost cooled cupcakes as desired. You can use a piping bag if you have one, if you don't you can just place a generous amount of the frosting on top of each cupcake and then with the back of your spoon flick the frosting up so it looks peaked. 

9. When you're happy with the frosting you can then add the chopped nuts and chocolate chips, there's no one way of doing this, I like the organised chaos look. As long as you get a little bit of everything in each bite, you're good to go.


"It's Peanut Butter Cupcake Time"